Showing posts with label Upholster. Show all posts

Wednesday, 13 March 2013

Standard Lamp Makeover Version 2.0


Remember last time I re-styled a standard lamp and I mentioned I had an idea in my head that involved red gloss paint? Well here it is. I am super excited because this project turned out almost exactly how I had it pictured in my head. That almost never happens!

I have now decided that THIS lamp will stay at home with us and the other lamp will be getting sold. This one matches our couches perfectly.

Here are some before and after pictures so you can see what a relief it is to have this lamp finished!


Haha I think that my lawn may be slightly uneven looking at these photos.

Anyway here are the details:

Lamp and Shade: Pretty sure it was around $20 from a garage sale.
Spray-paint: Super Cheap Auto's brand - around $7 per can, I used a Grey Primer and Gloss Red
Fabric: After hunting around fabric shops I found this fabric in curtain form at The Warehouse $39 for a pair and I used just less than one length. Cushions maybe?
Trim: $3.99 per metre from Lincraft. I used just shy of 6m

Surprise fact about this project:
The top 'crown' of the shade (as I like to call it) detatches completely from the main frame when it in unpicked. It sure makes it easier to recover, I'll tell you that! Plus that magic trim hides a multitude of stitches.

What do you think of the red? Is bold better?

Friday, 1 March 2013

Standard Lamp Makeover


Another one of my collections involves standard lamps. It isn't huge but I am sure that it will grow, I just can't help myself. I own 3 so far, I have now re-covered two of them and I have big plans for the third. It involves the colour red.

Another thing I have to mention is why are before photos so terrible! (well mine usually are anyway) I think it is because by the time I remember to take a photo I am already in the zone of deconstructing - usually late at night - and who wants to ruin that zone! Well, that's my excuse anyway.

I had the fabric for this project lying around for about 2.5 years but it was disguised as a tablecloth and I had totally forgotten about it. I did a quick visual estimate and determined that I had enough material to tackle this project and I was away laughing.

I used some black trim on the top and bottom of the lampshade - inside and out and I used a total of 5.5m (I bought 6 - good guessing!)


Primer (at Dave's insistance)

First coat of black
The shade with the old wooden base

Let there be light!

The pretty turned base. I used matt paint but put a coat of clear gloss so it looks quite flat. I like it.


What do you think? Would this old piece fit in a modern room now? 
Would it be put in a corner or would it be pride of place somewhere?

Tuesday, 5 February 2013

Cow Print Footstool - Re-Upholstered


Last weekends project was to finally re-cover this footstool. It had been waiting for some fabric because the stuff I was going to use was too short.
I finally made it to Kutwell Fabrics and hunted for suitable fabric, and nothing caught my eye. Then all of a sudden I saw this cow print fabric and had a revelation. I could cover the stool in this fabric* and give it to two of my amazing friends!

* The cow print refers to their last name (Mutu) which they lovingly refer to as moo2. Baby moo2 has a very awesome cow onesie and a cow print cup so I was just going with the trend..)

As I was buying the fabric I realised that it was quite thin and a bit see-through so I decided to grab some calico to put underneath. Kutwell is a seriously amazing bargain fabric store, they have the basics (calico, batting, zips etc) for super cheap and although their fabric selection may not be 'on trend' they still have a wide range of fabrics.

Anyway the point of that promo was to say that the total price for 1.5m calico and 1.5m cow print was $7. What the!

The Re-Upholstry Run Down

Like usual, the first step was to remove the black fabric underneath the footstool with a pointy tool to remove the staples. I use the flat head screwdriver attachment on my multi-tool.

The next step was removing more staples that held on the fabric.

Once the staples were pulled, the fabric was removed to reveal the bare-bones footstool.


I sanded the chipped varnish off the legs of the stool at this point.

I unpicked the fabric I had just removed and used that as the pattern for my new calico and cow print layers.

Following the same seam lines that were on the original fabric, I sewed down each corner of the calico fabric and tried it on the stool. Each corner sat well so I went ahead and pulled it tight and stapled it on.


I followed  the same process with the cow print fabric but when I tried it on the stool, one of the corners was a bit too tight so I had to unpick and sew the seam a bit smaller. 

I stapled down the cow fabric carefully then stapled a new piece of leftover calico underneath because the old black piece was getting a bit ratty.


I am really amped about how this footstool turned out! It was way out of my comfort zone using fabric like this but I really love how funky it looks.


I hope the Moo2's are enjoying their footstool and get a smile on their face when they put their feet up!

Also dont forget to enter my GIVEAWAY on my last post!

Thursday, 17 January 2013

Cane Chair Restoration and Re-style


Thanks to some great friends who are always on the lookout for roadside treasures for me, I scored this classic cane chair for free!

The cane on the arms had holes in it so instead of trying to repair it, I decided that it should go. The only problem was that the stubs of leftover cane were sharp and scratchy.

The solution Dave came up with was to arm me with a brutal wire brush attachment on a drill and let me loose grinding the stubs down. It worked!

I then had to sand and sand and sand then paint coat after coat after coat then sand again and BEHOLD! One beautifully restored chair.

Don't look too closely at the piping on the cushion, it was my first time making my own and its a wee bit wonky. Other than that, I think it turned out rather well! It also just happens that the foot stool I re-upholstered back in August fits in well to create a rather relaxed chair destined for a sunny spot in the lounge.

P.s I have been riding my bicycle to and from work every day this week, it just so happened to be the wettest week in summer which put a bit of a dampener on things (get it!). But so far, so good and I am enjoying getting some fresh air.

xx Amy

Wednesday, 9 January 2013

Patchwork Footstool


My beautiful friend (and workmate) Ellena picked this footstool off the side of the road for me. She took it on her bike to work. Dedication.

I was going to cover it in more stripes but had a brilliant flash of inspiration to do a bit of a patchwork look in pretty corals and creams.


I am absolutely stoked with how this came out.

And as per my resolution (non-specific, just to get rid of crap we don't REALLY need/want)
it is FOR SALE over here on Trade Me.

Plus if you ever see things like this on the side of the road (in Christchurch) let me know! It is one of my favourite versions of recycling.

xx

Thursday, 9 August 2012

Re-Upholstered Footstool

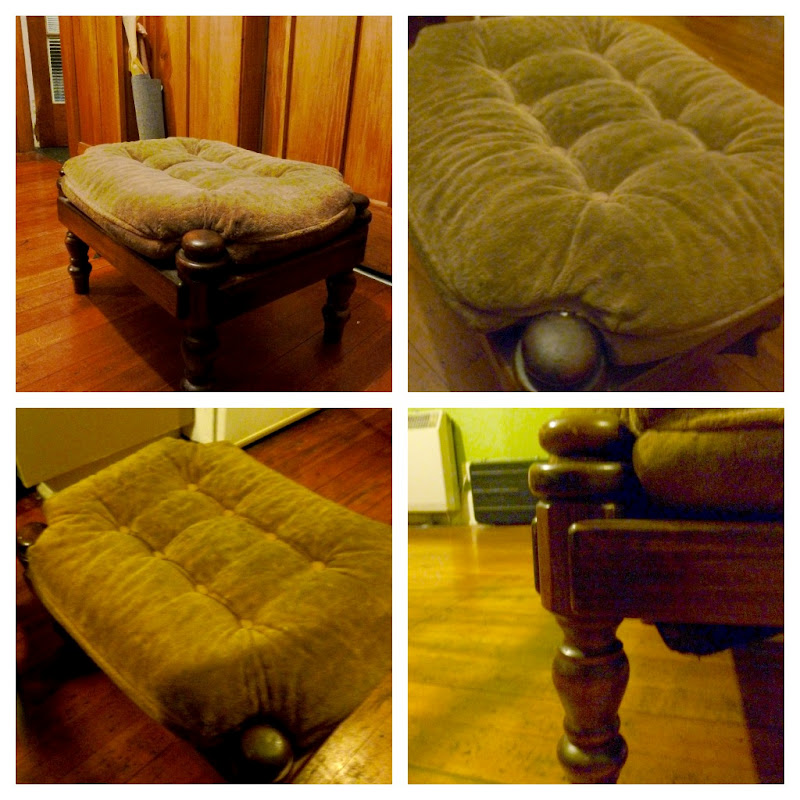
I picked up this spew-green velour footstool from the local recycling store for $25 a couple of weeks ago. A bit pricey as far as second-hand items go but I had a vision and some spare money in my craft budget.

This sucker is tufted with fabric covered buttons, new territory for me.

In any case, I did my usual business of pulling it apart mostly intact and copying the pattern.

I decided not to use matching piping around the edges and instead of putting in 8 buttons, I used 6.

The fabric I found was a serious bargain. I headed to Spotlight and checked out the clearance section and found some fabric I liked for $10 per metre. I looked up and saw a sign that said '50% off marked price' - SCORE! there was only 5m left on the roll so I bought the whole thing for $25! I have enough leftover fabric to potentially cover a chair I have lying around - stay tuned!

I also painted the footstool cream, with the same paint I used to re-style this desk.

Another thing I must mention is the fact that I needed an extra long needle to sew on the buttons, I asked Dave if he had anything suitable in the shed and he made me a needle out of a piece of steel. He MADE me a needle, crazy ay! He banged one end flat and drilled the 'eye' then got the grinder out and ground the other end to a point while it was rotating in his drill. I love that man.

Anyway, as usual I made a huge mess of the lounge when I was working on this project and only managed to take a couple of photos of the process so here you go:

The fabric cut to size

Checking out what it will look like
 And without further ado... here is the finished product!


Killer made an appearance in the photoshoot


Put to good use
What do you think of the fabric? I know it is a footstool and light fabric wasn't the greatest choice but I will enforce the 'socks or clean slippers only' rule. It was a bit of a step away from my usual Damask pattern I gravitate towards and Dave was a bit surprised but I had stripes in my mind when I first saw the spew-green footstool. 

I have well and truly got the upholstery bug so Cantabrians - keep an eye out for good bargains for me!

p.s I totally got the stripes to match! WIN!

Thursday, 21 June 2012

From T-Shirt to Cushion

Dave has a band t-shirt he loves, but it got into a bit of a pink accident with a towel. So he never wore said t-shirt again in public. He suggested I turn it into a cushion for him. I figured what the hey, I can do that. So I did.


Edit: Credit for this idea came from the beautiful Rosita Kennedy!

Pretty cool ay! The band, if you are interested, is August Burns Red. You may want to turn down your speakers slightly.

The other project I undertook at the same time was turning a wee tote bag into a cushion.

Its already a cushion at this stage, I just pretended the straps were still on :P


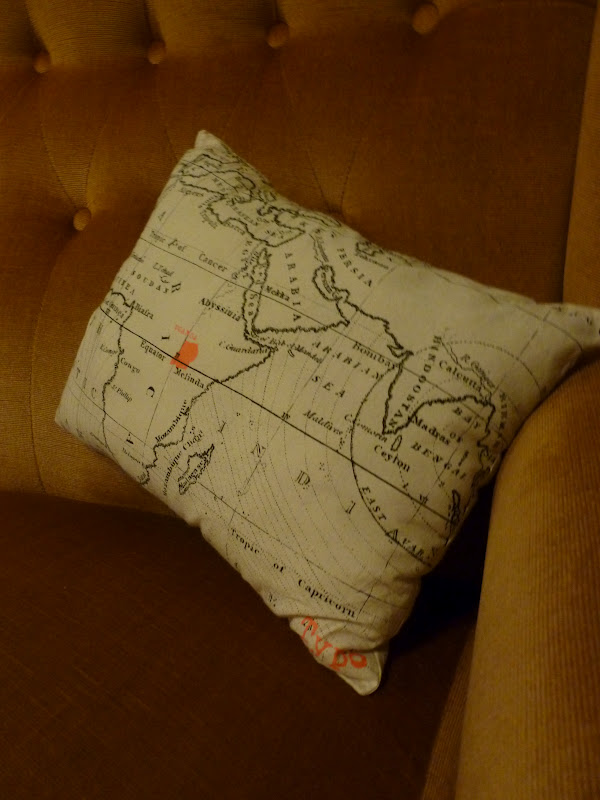
This tote bag was a $2 charity donation with purchase at Typo. I stuffed both cushions with remnants from the winter weight duvet inner I used for my Quilt.

(I borrowed this idea from my friends Alicia and Corey. They had done it with 2 of these bags, and I had one lying around - Thanks!)